
1. Set Up Site Title, Tagline, and Timezone
One of the very first tasks you should complete is setting up your site’s title, tagline, and timezone correctly. Head to Settings » General in your WordPress admin dashboard. The site title serves as the name of your WordPress website development and is prominently displayed in the header area. Choose a title that clearly identifies your brand and the purpose of your website.
The tagline is a brief, catchy statement that summarizes what your site is about. Replace the default “Just another WordPress site” with something descriptive that represents your brand’s offerings or your site’s specific niche. A well-crafted tagline can attract the right audience and set expectations.
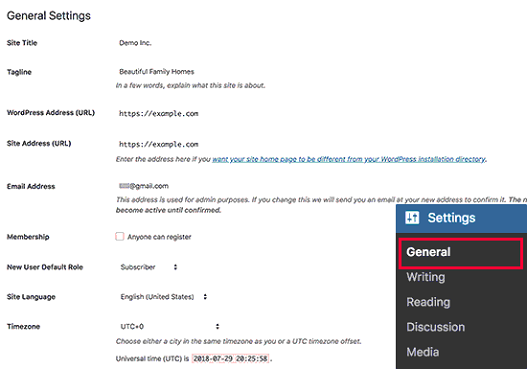
Selecting the accurate timezone is crucial, as it ensures your posts and content get scheduled and published at the intended local times. This is especially important if you plan on using WordPress’s built-in scheduling or editorial calendar features.
2. Allow User Registration
Decide early on if you want a multi-author blog or prefer being the sole content creator. To allow user registration for multiple authors, go to Settings » General and tick “Anyone can register”. Additionally, set “New User Default Role” as “Contributor” so new users can create content while you control what gets published. If you don’t need multiple contributors, leave user registration disabled.
3. Adjust Comment Settings
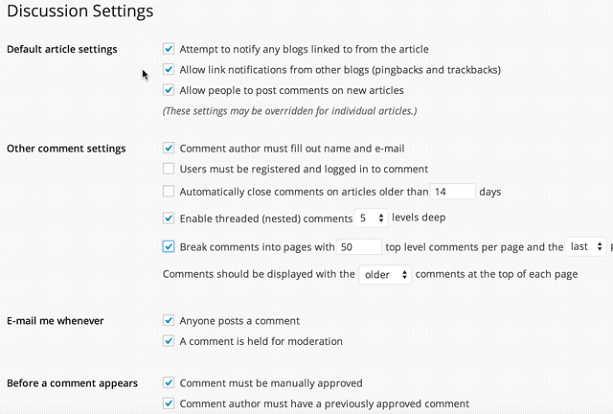
The Discussion settings page (Settings » Discussion)allows you to configure various options related to comments on your site. Most settings are self-explanatory, such as enabling comment moderation to approve comments before they go live. This page also lets you set up comment blacklists, allow or disable threaded (nested) comments, and more. Take time to familiarize yourself and adjust these settings per your preferences.
4. Optimize Image Handling
Out of the box, WordPress creates multiple-sized versions (thumbnail, medium, large) of every image you upload to the media library. While intended to ensure properly scaled images for various displays, this behavior can quickly bloat your site with redundant image files if left unchecked.
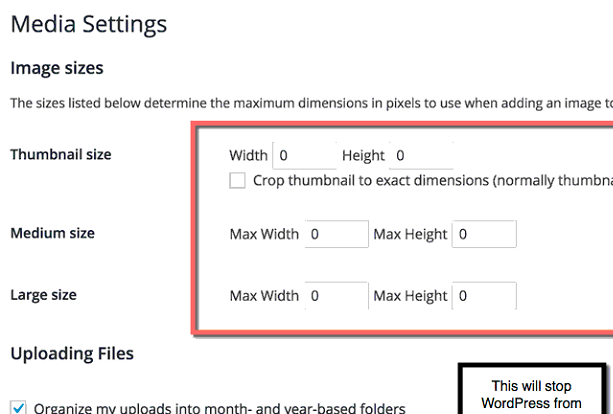
To prevent this, go to Settings » Mediaand disable the creation of unnecessary image sizes upon upload. It’s generally recommended to keep only the “Large” size enabled and set its dimensions to the maximum you expect to use images at (e.g. 1500px wide for blog posts).
Additionally, install an image compression plugin like Smush, Imagify, or EWWW Optimizer which will automatically optimize and reduce the file size of uploaded images without compromising quality.
5. Set WordPress and Site URLs
Ensure your WordPress Address URL (where your WP core files are installed) matches your preferred domain setting in Google Search Console – with or without the “www” subdomain. Search engines treat www and non-www versions as separate sites unless you specify your preference and set up redirects.
The Site Address URL can differ if your WordPress installation is separate from your actual homepage (like in a subdirectory). But in most cases, these two URLs will be the same. Configuring them accurately is crucial for search engines to index and rank your site properly.
6. Choose Your Front Page
When first installed, WordPress displays your latest blog posts on the homepage by default. However, you may want a static front page with custom content tailored for your brand, product showcases, lead capture forms, etc.
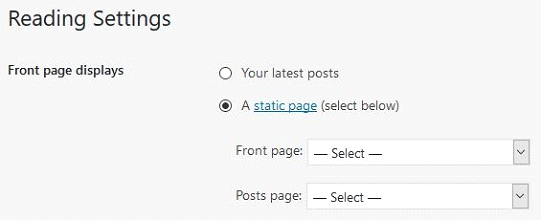
You can set this up by going to Settings » Reading. Here, choose the “A static page” option and select which specific pages you want to use for the homepage and blog post listings. This allows you to have a visually compelling and customized front page separate from your blog content.
7. Optimize Permalink Structure
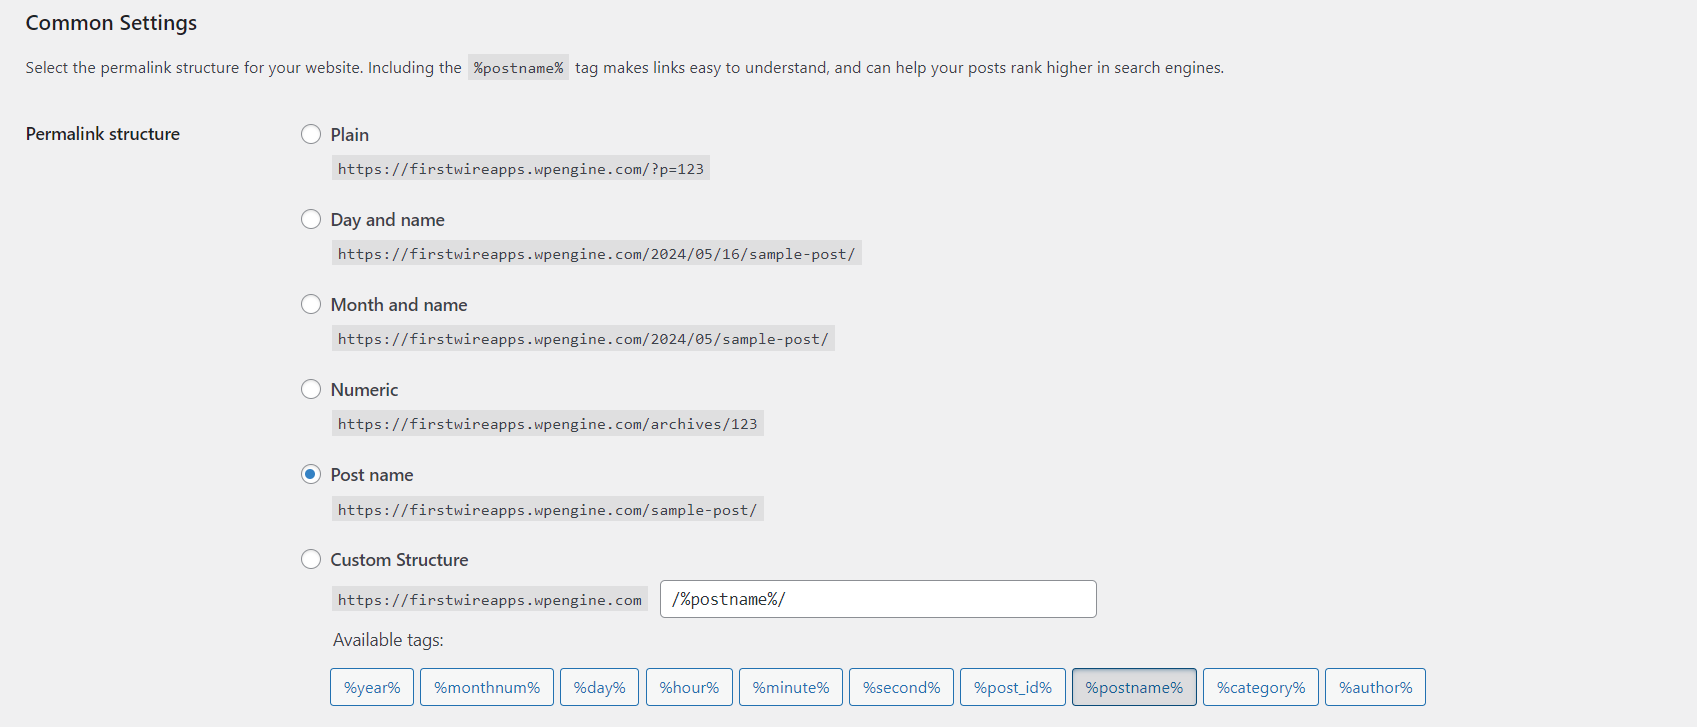
The permalink settings control the URL structure of your posts, pages, and other content. Choose settings that provide clear, user-friendly, and SEO-optimized URLs. The recommended permalink structure is to use only the post name, omitting redundant elements like post ID or date/category details.
8. Configure Date/Time Settings
Within Settings » General, you can select your location’s timezone to ensure post timestamps are accurately set to your local time. This area also allows you to set your preferred date and time formatting styles for how this data is displayed on your published content.
9. Install and Activate a Theme
A well-designed, functional, and responsive theme is crucial for your WordPress website’s success. While some free themes are pre-installed, it’s advisable to choose a premium third-party theme that closely matches your branding and content requirements.
Once you’ve uploaded and installed your desired theme, activate it by going to Appearance » Themes. Then, delete any unnecessary pre-installed themes to keep your WordPress installation lean.
10. Add a Favicon
A favicon is that small icon that represents your brand and website across browser tabs, bookmarks, and device home screens. Under Appearance » Customize » Site Identity, you can upload a square image of at least 512x512px dimensions to set as your site’s favicon or shortcut icon.
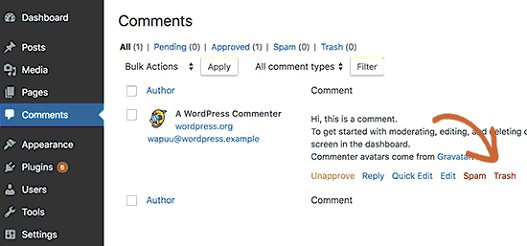
11. Clear Sample Content
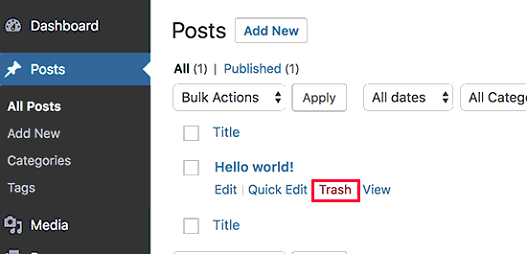
When first installed, WordPress creates a sample post, page, and comment for demo purposes. However, you should delete this placeholder content to start with a clean slate by navigating to Posts, Pages, and Comments and permanently removing the “Hello World” post, sample page, and default comment.
12. Create Content Categories
Categories are essential for organizing your posts into distinct topics, making it easier for visitors to find related content they’re interested in. Spend some time planning out relevant category names based on the subjects you’ll be publishing content on.
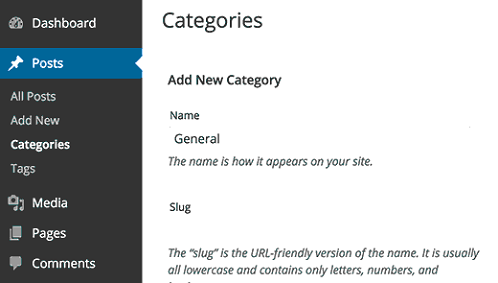
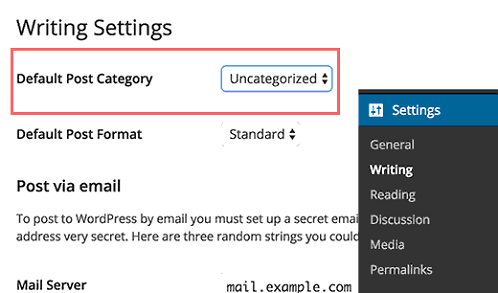
You can add new categories by going to Posts » Categories. Also, remember to rename the default “Uncategorized” category to something more descriptive for your site.
13. Configure Sidebar Widgets
Most WordPress themes come with at least one widgetized sidebar area located next to the main content column.
Go to Appearance » Widgets to add, remove, or rearrange the widgets that appear in this sidebar based on your requirements and theme’s layout.
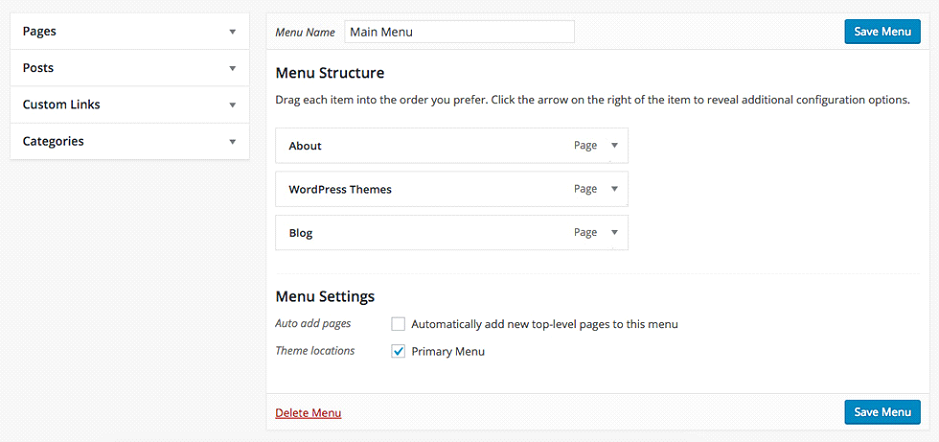
14. Set Up Custom Navigation
Rather than relying on the default menu links generated from your list of pages, create a custom navigation menu tailored to your website’s structure and user experience goals. The Menus screen under Appearance allows you to build feature-rich menus including custom links, categories, post listings, and nested sub-menus.
15. Update Admin Credentials
For enhanced security, change the default “admin” username assigned during installation to something more unique. You should also update the password to a strong, complex one making it harder to brute-force guess. Leaving default admin credentials increases your site’s susceptibility to hacking attempts.
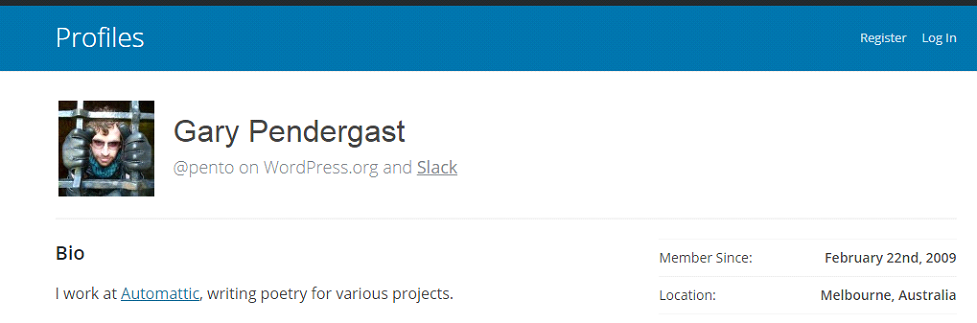
16. Update Admin Credentials
Take some time to comprehensively fill out your personal user profile accessed via Users » Your Profile. Update details like your name, biographical info, and contact details here. Depending on your theme, some of these details may be publicly displayed when you’re shown as the author of posts and pages.

17. Set Up Gravatar
A Gravatar (Globally Recognized Avatar) is a portable profiler picture that follows you around the web. Sign up for a free Gravatar account to upload an avatar image that will be displayed next to your author details and comments across the WordPress sites you engage with.
18. Add Contributors
If you plan to have multiple authors contributing content to your WordPress site, go to Users » Add New to create user profiles for each. Assign appropriate roles like Editor, Author, or Contributor based on the level of access you want to grant them.
19. Remove Unwanted Plugins
WordPress comes pre-installed with some plugins like <strong<Hello Dolly and Akismet. If you don’t plan to use certain plugins, remove them from the Plugin menu to keep your installation lightweight and optimized.
20. Fight Comment Spam
Comments are great for engagement but also a common avenue for spam. Install anti-spam plugins like Akismet or Antispam Bee that will automatically filter out spam comments, keeping your site clean while saving you considerable moderation efforts.
21. Improve SEO
Optimize your WordPress site for search engines by using comprehensive SEO plugins like Yoast SEO. It guides you through critical on-page optimizations, generates XML sitemaps to improve indexing, and provides actionable insights to improve your SEO for WordPress sites.
22. Enable Analytics Tracking
To gain valuable insights into your website’s traffic sources, user behavior, and key metrics, it’s essential to set up analytics tracking. Create a free Google Analytics account, then install and configure the tracking code using a plugin like MonsterInsights.
23. Implement Caching
Caching drastically improves your WordPress site’s loading speed and ability to handle traffic surges by serving static HTML files to visitors instead of dynamically rebuilding pages for each request. Install robust caching plugins like WP Super Cache, W3 Total Cache, or WP Rocket.
24. Enhance Security
Even though WordPress is a secure platform, it’s advisable to add extra protection against malicious attacks and unauthorized access attempts. Install reputable security plugins like Wordfence or All In One WP Security to firewall your site, enforce other hardening techniques, and get regular malware scans.
25. Schedule Backups
Regularly backing up your entire WordPress site’s database and files is crucial to recovering seamlessly if anything goes wrong – whether it’s hacking incidents, failed updates, or unexpected data loss. Set up automatic backups by using plugins like BackupBuddy, BlogVault, or UpdraftPlus.
26. Add Social Sharing
Help increase your content’s visibility and engagement by making it easy for visitors to share your posts across their social networks. Install dedicated social sharing plugins like Sassy Social Share Shared Counts, or AddToAny to display configurable share buttons.
27. Display Related Posts
Improve your WordPress site’s stickiness by suggesting additional relevant content based on the current post or page using plugins like WordPress Related Posts or YARPP. This encourages visitors to explore more topics and spend more time engaging with your content.
28. Monitor Links
Broken or outdated links can hurt your SEO by creating poor user experiences and impacting crawlability. Avoid this by using plugins like Broken Link Checker that scan your content for broken URLs, and missing resources, and alert you to fix them.
29. Create a Contact Form
Make it convenient for site visitors to reach out by adding a functional contact form to your WordPress site. Install the popular Contact Form 7 plugin and configure fields like email addresses, names, subjects, and validation to capture inquiries seamlessly.
30. Compress Images
Large, high-resolution images have a severe impact on your WordPress site’s page load times and performance. Install plugins like EWWW Image Optimizer, Smush, or ShortPixel that automatically compress and optimize uploaded images without degrading visual quality.
31. Customize Login Page
Brand and customize the default WordPress login page to give it a more professional, on-brand look and feel.
You can do this either by installing plugins like Uber Login Logo or Custom Login or by adding some custom code to modify the login screen’s styles.
32. Modify Footer
The footer area of your WordPress site is a great place to add important static information that should be accessible site-wide. Depending on your theme, you can modify the footer content to include your copyright notice, links to legal pages like Privacy Policy and Terms, author credits, social media icons, and more.
33. Verify in Webmaster Tools
Submit your WordPress site to Google Search Console (previously Google Webmaster Tools) for verification. This free service provides valuable data about your site’s indexing status, crawl errors, search insights, security issues, and performance metrics – helping you identify and fix any SEO problems.
34. Set Up RSS Feeds
Really Simple Syndication (RSS) feeds allow your content to be easily accessed and read via feed readers, email clients, and other devices. Integrate with a platform like Feedburner that turns your WordPress site’s updates into a subscribable RSS feed.
35. Write an About Page
An About page introduces your brand and gives readers some background about who you are. Create an engaging About page that shares your story, credentials, and value proposition in an authentic way that helps build trust and credibility with new visitors.
36. Post Privacy Policy
In many regions, having a clear Privacy Policy is legally required to disclose the type of user data you collect and how it is handled. Draft a privacy policy that transparently states your privacy practices and user data policies. You can use plugins to automatically generate basic legal pages.
37. Limit Login Attempts
Enhance your WordPress login security by installing the Limit Login Attempts plugin. It prevents brute-force attacks by temporarily blocking IP addresses after a set number of failed login attempts over a given period of time.
38. Create a Child Theme
Before making any significant code customizations to your theme’s core files, create a child theme. This allows your custom code changes to be safely inherited while preventing your modifications from being overwritten when the parent theme gets updated.
39. Build an Email List
Start building an email list from day one as it’s one of the most valuable assets for promoting your content and turning visitors into leads/customers. Use opt-in plugins like ConvertKit, MailChimp, or Constant Contact to capture subscriber emails.
40. Manage Post Revisions
By default, WordPress keeps revisions for every edit made to your posts and pages, which can bloat your database over time. Install plugins like Better Delete Revision or Revision Control to automatically purge these redundant revisions and recover space.
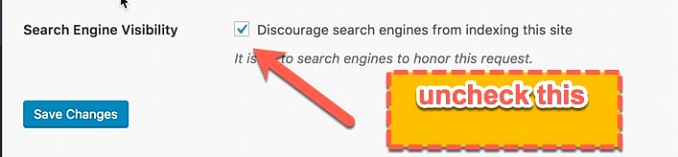
41. Allow Search Indexing
Once your WordPress site is ready to launch, ensure search engines can crawl and index it by unchecking the “Discourage search engines” option under Settings > Reading. This signals to robots that your content is publishable.
42. Update Ping Services
WordPress automatically notifies search engines of new posts or updates via ping list, aiding faster indexing.
Some important ping sites are as below:
http://blogsearch.google.com/ping/RPC2
http://bblog.com/ping.php
http://bitacoras.net/ping
http://blog.goo.ne.jp/XMLRPC
http://blogdb.jp/xmlrpc
http://blogmatcher.com/u.php
http://bulkfeeds.net/rpc
http://coreblog.org/ping/
http://mod-pubsub.org/kn_apps/blogchatt
http://www.lasermemory.com/lsrpc/
http://ping.blo.gs/
http://ping.bloggers.jp/rpc/
http://ping.feedburner.com
http://ping.rootblog.com/rpc.php
http://pingoat.com/goat/RPC2
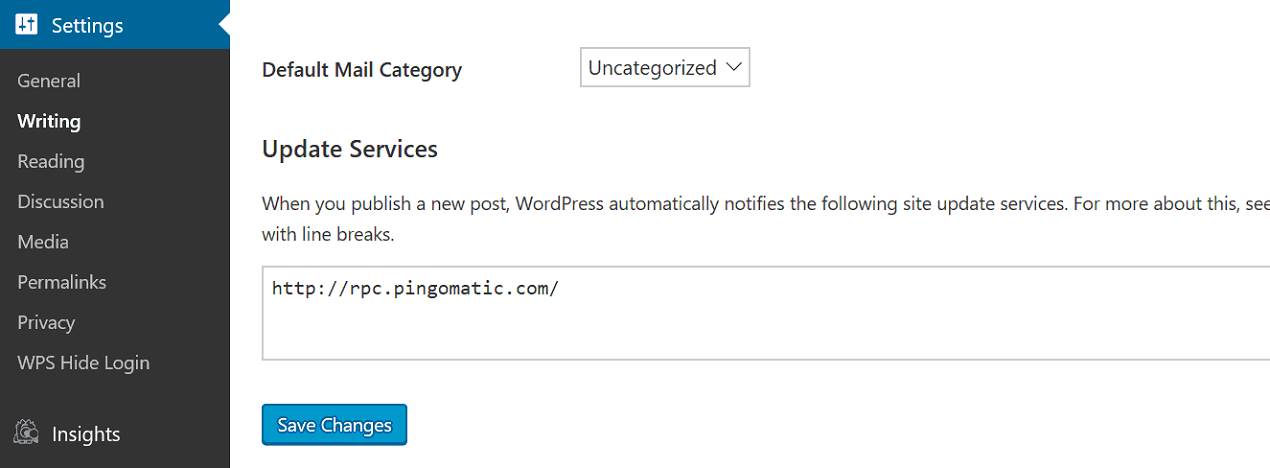
WordPress automatically notifies a list of ping/tracking services when you publish new content to expedite its indexing. Review this list under Settings > Writing and update it with only the active, preferred services you want notifying.
43. Disable Directory Browsing
For security, disable the directory browsing functionality on your site which allows visitors to see and access your WordPress directories/files directly. This is done by adding the code “Options -Indexes” to your root .htaccess file.
44. Test Responsiveness
With a majority of web traffic now coming from mobile devices, ensuring your WordPress site is responsive (displays properly across devices/screen sizes) is critical. Use browser developer tools, online emulators, and real device testing to identify any responsiveness issues.
45. Use a CDN
Implement a Content Delivery Network (CDN) service like Cloudflare, StackPath, or Bunny.Net to improve your site’s global accessibility and loading speeds by serving static files cached from data centers closest to each visitor’s location.